
Did you know that using a magnifying glass to start a fire is not just a survival skill, but it’s also a fascinating technique that has been used for centuries?
Yes, it’s true! In fact, this method has been employed by countless explorers, adventurers, and even regular people in dire situations.
So, if you’re curious to learn how to harness the power of the sun and create fire with just a simple magnifying glass, keep reading to discover the step-by-step process that will leave you amazed and equipped with an invaluable skill.
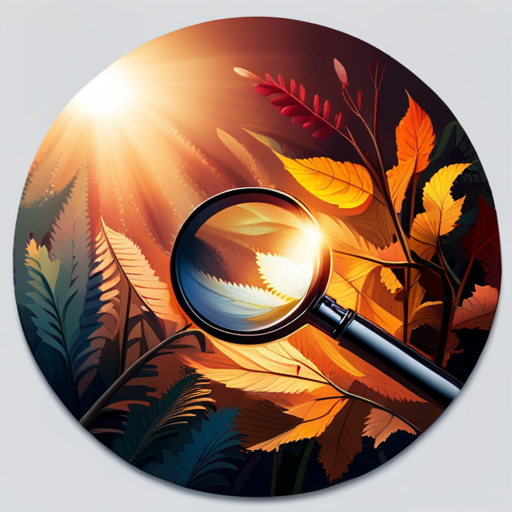
Choosing the Right Magnifying Glass
When selecting a magnifying glass, it’s crucial to consider your specific needs and preferences. The first thing you should think about is the magnification power. If you require a magnifying glass for reading small print, a lower magnification of 2x to 4x should suffice. However, if you need to examine tiny objects or intricate details, opt for a higher magnification of 5x to 10x.
Another important factor to consider is the size of the magnifying glass. If you plan to carry it with you or use it for extended periods, a compact and lightweight option would be more convenient. On the other hand, if you need a magnifying glass for tasks that require stability, such as soldering or jewelry making, a larger and heavier one would be more suitable.
Additionally, take into account the type of lens. A glass lens provides clear and distortion-free magnification but can be prone to shattering if dropped. A plastic lens, on the other hand, is lighter and less likely to break but may have some distortion.
Lastly, consider the handle design. Some magnifying glasses have a straight handle, while others have a handle that curves to fit your hand comfortably. Choose one that feels comfortable and secure in your grip.
Finding the Ideal Spot
Now that you have chosen the right magnifying glass for your needs, let’s focus on finding the ideal spot for lighting a fire with it.
When it comes to finding the perfect location, there are a few key factors to consider.
First and foremost, you want to ensure that you have plenty of sunlight. Look for an area that’s open and exposed to direct sunlight, without any obstructions like trees or buildings casting shadows. The more sunlight you have, the more intense the heat will be, making it easier to start a fire.
Additionally, it’s important to choose a spot with a suitable surface. Ideally, you want a flat, dry surface that can efficiently absorb and concentrate the sunlight. Avoid surfaces that are reflective or glossy, as they’ll not focus the sunlight effectively.
Lastly, consider the wind direction. You want to choose a spot where the wind isn’t blowing directly at you, as it can disrupt the concentration of the sunlight.
Preparing the Fire Bed
To prepare the fire bed, start by clearing away any debris and creating a flat surface. This step is crucial because it ensures that your fire will have a solid foundation and will burn efficiently.
Begin by removing any leaves, twigs, or other combustible materials from the area where you plan to build your fire. Use a small shovel or your hands to scoop up the debris and place it away from the fire pit.
Once the area is cleared, use the back of the shovel or your foot to level out the ground, creating a flat surface. This will help prevent the fire from spreading unevenly and ensure that it burns evenly.
It’s important to note that the fire bed should be a safe distance away from any flammable objects, such as trees or tents.
Positioning the Magnifying Glass
After preparing the fire bed, the next step is to position the magnifying glass in the optimal location for starting a fire. To effectively use the magnifying glass, you need to find a sunny spot with direct sunlight. Position yourself so that the sunlight passes through the magnifying glass and focuses on the tinder bundle or fire starter material. The magnifying glass should be held about 2-3 inches above the tinder bundle, allowing the focused sunlight to hit the target area. Ensure that the magnifying glass is perpendicular to the sunlight, as this will maximize the concentration of light and heat.
When positioning the magnifying glass, it’s important to hold it steady and keep it still. Any movement can disrupt the focused sunlight and reduce the chance of igniting the tinder. Find a comfortable position and maintain a steady hand. It may be helpful to rest your elbow or forearm on a stable surface to minimize shaking.
Additionally, it’s crucial to adjust the distance between the magnifying glass and the tinder bundle as needed. If you notice that the sunlight isn’t concentrated enough, move the magnifying glass closer to the tinder. On the other hand, if the sunlight is too intense and starts to burn the tinder, increase the distance between the magnifying glass and the tinder bundle. Experiment with different positions until you find the optimal spot where the magnifying glass focuses the sunlight most effectively.
Focusing the Sunlight
To effectively focus the sunlight, ensure that the magnifying glass is perpendicular to the sunlight and held steady. Position yourself in a way that allows the sunlight to pass through the magnifying glass without any obstructions. Hold the magnifying glass firmly with one hand, keeping it steady and stable. Avoid any unnecessary movements that may disrupt the focus of the sunlight.
Now, bring the magnifying glass closer to the target object, such as a piece of paper or dry leaves, while maintaining the perpendicular angle. The closer the magnifying glass is to the object, the smaller the focused area of sunlight will be, which increases the intensity of the heat generated. This will help you achieve the necessary conditions for starting a fire.
As you adjust the distance between the magnifying glass and the target object, pay attention to the size of the focused spot of light. It should be as small and concentrated as possible to maximize the heat output. You can experiment with different distances until you find the optimal position that produces the most intense heat.
Creating the Ember
Now that you have successfully focused the sunlight with the magnifying glass, let’s move on to creating the ember. This step is crucial because without a glowing ember, you won’t be able to start your fire.
To create the ember, you need to concentrate the focused sunlight onto a small, dry tinder bundle. The tinder bundle should consist of fine, dry materials such as dried grass, leaves, or wood shavings. Place the tinder bundle in a stable position, making sure it won’t move or be blown away by the wind.
Hold the magnifying glass steady and adjust the angle to maximize the concentration of sunlight onto the tinder bundle. Move the magnifying glass slightly, tracing small circles on the tinder bundle to distribute the heat evenly. Keep focusing the sunlight until you see a small wisp of smoke rising from the tinder bundle.
Be patient and continue to concentrate the sunlight until you see a tiny glowing ember. Once the ember is formed, carefully transfer it to your prepared fire pit and gently blow on it to encourage the flames to grow.
Congratulations, you have successfully created an ember and are one step closer to starting your fire.
Starting the Fire
To begin the process of starting the fire, carefully place the glowing ember into your prepared fire pit. Make sure the ember is positioned in the center, surrounded by dry twigs, leaves, or small pieces of wood. These materials will catch fire more easily and help ignite the larger pieces of wood.
Now, hold the magnifying glass between your hand and the sun, angling it towards the ember. Move the magnifying glass slowly and steadily, focusing the intense beam of light onto the ember. The heat from the concentrated sunlight will gradually increase the temperature of the ember, causing it to smolder and eventually burst into flames.
Be patient and continue to concentrate the sunlight on the ember. As the ember becomes hotter, you may notice small wisps of smoke rising from it. This is a good sign that the fire is starting to take hold. Maintain a steady focus with the magnifying glass until the ember ignites into a small flame.
Once the flame has formed, carefully blow on it to provide oxygen and encourage its growth. Gradually add more twigs and small pieces of wood to the fire, gradually building it up. As the fire grows, you can add larger logs to sustain it.
Remember to always practice fire safety and keep a bucket of water or fire extinguisher nearby in case of emergencies. Enjoy the warmth and comfort of your successfully started fire!

Bushcraft Techniques, authored by Darell Strouth, is an insightful guide that delves into the art of surviving and thriving in the wilderness. Drawing on his extensive experience and passion for the outdoors, Strouth offers practical advice and innovative strategies for mastering bushcraft skills. His website, BushPath.com, serves as a valuable resource for enthusiasts, featuring a wide range of tips, tutorials, and insights into the world of wilderness survival and nature exploration.