
When it comes to indulging in the sweet taste of nature’s bounty, there is a method that allows you to procure your own sugar straight from the trees.
But how exactly does one go about safely collecting and boiling tree sap for this purpose?
Well, fear not, for in this discussion you will uncover the secrets to successfully tapping into this delectable process.
So, prepare yourself to embark on a journey of discovery, as we explore the art of transforming tree sap into a delicious homemade sugar.
Choosing the Right Tree Species
When choosing the right tree species for collecting and boiling tree sap for sugar, consider their sap production and sugar content. Some tree species are more suitable for sap collection and have higher sugar content than others.
Maple trees, such as the Sugar Maple and Red Maple, are popular choices due to their high sap production and sugar content. These trees produce a sweet sap that can be boiled down to make delicious maple syrup.
Birch trees, like the Yellow Birch and Paper Birch, also have sap with a good sugar content and are commonly used for syrup production.
Another option is the Black Walnut tree, which produces a sap with a distinct flavor and moderate sugar content.
However, it’s important to note that not all tree species are suitable for sap collection and boiling. Some trees, like evergreens, have sap that isn’t suitable for syrup production as it has a low sugar content and can have a bitter taste.
Therefore, it’s essential to research and select the right tree species that will yield the best results in terms of sap production and sugar content.
Timing and Season for Sap Collection
To maximize sap production, it’s important to collect tree sap during the optimal timing and season. The ideal time to start collecting sap is in early spring, when the temperature hovers around freezing during the night and rises above freezing during the day. This temperature fluctuation creates pressure changes within the tree, causing the sap to flow. It’s important to note that the exact timing can vary depending on the region and tree species.
In general, the sap starts flowing when the trees begin to bud, and it continues for about four to six weeks. It’s crucial to collect the sap during this limited window to ensure a bountiful yield. You should monitor the weather closely, as unseasonably warm weather can cause the sap to stop flowing prematurely. On the other hand, if the weather remains consistently cold, the sap flow may be delayed or reduced.
Another factor to consider is the species of tree you’re tapping. Different tree species have different optimal timing for sap collection. For example, maple trees produce the most sap when temperatures drop below freezing at night and rise above freezing during the day. Birch trees, on the other hand, may start flowing earlier in the season.
Essential Equipment for Sap Collection
You will need a few essential pieces of equipment for collecting sap from trees.
The first item you’ll need is a sap collection container. This can be a traditional metal or plastic sap bucket, or you can use a more modern option like a food-grade plastic bag or tubing. Make sure the container has a tight-fitting lid to prevent any debris or insects from contaminating the sap.
Next, you’ll need a tapping tool. This can be a specialized tree tapping drill bit or a small hand drill. The tool should be clean and sharp to ensure a clean tap into the tree trunk.
To collect the sap, you’ll also need a spile or a tap. The spile is inserted into the tapped hole in the tree and acts as a conduit for the sap to flow into the collection container. It’s important to choose a spile that fits snugly into the hole and has a hook or a loop to hang the collection container.
Lastly, you’ll need a sap collection system. This can be as simple as a single bucket hanging from a spile, or you can use a more complex system with multiple collection containers connected by tubing.
Tapping the Tree for Sap Extraction
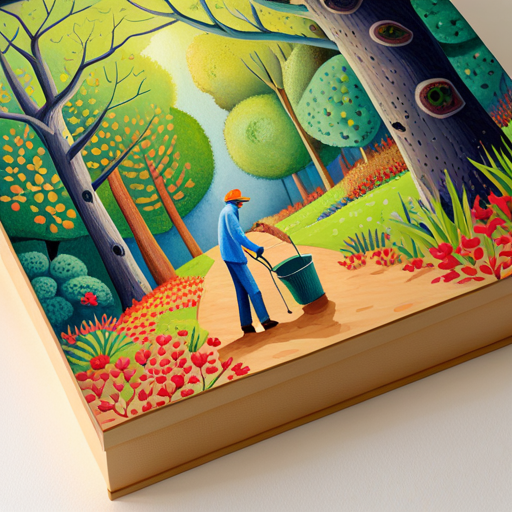
Consider using a tapping tool to create a clean tap in the tree trunk, allowing the sap to flow for extraction. This tool is specifically designed to make a small hole in the tree without causing significant damage. It’s important to choose the right spot on the trunk for tapping. Look for a healthy tree that’s at least 10-12 inches in diameter. The chosen spot should be about 2-3 feet above the ground, on the sunny side of the tree. Take caution not to tap a tree that’s already stressed or diseased.
To tap the tree, hold the tapping tool firmly and position it at a slight upward angle. Gently tap the tool into the tree trunk with a hammer until it reaches the desired depth, usually about 1.5-2 inches. Once the tool is in place, carefully remove it and attach a collection container, such as a food-grade bucket or a specialized sap collection bag, to the tap. The sap will start flowing immediately, and it’s important to check the container regularly to prevent overflow.
Remember to clean and sanitize the tapping tool after each use to prevent the spread of diseases. By using a tapping tool, you can efficiently collect sap from the tree without causing significant harm, ensuring a successful and sustainable sugar-making process.
Proper Collection and Storage Techniques
After successfully tapping the tree and attaching a collection container, it’s important to implement proper collection and storage techniques for the extracted sap.
First and foremost, ensure that the collection container is clean and free from any contaminants. Any impurities can affect the taste and quality of the final product. As you collect the sap, make sure to regularly check and empty the container to prevent overflow and minimize the risk of contamination.
When it comes to storing the collected sap, it’s crucial to keep it refrigerated at all times. The sap should be stored in airtight containers to prevent exposure to air, which can lead to fermentation and spoilage. It’s recommended to use glass or food-grade plastic containers for storing the sap. Avoid using metal containers as they can react with the sap and alter its taste.
Additionally, labeling the containers with the date of collection can help you keep track of the freshness of the sap. Remember, the sooner you process the sap into syrup, the better the flavor and quality will be. If you’re unable to process the sap immediately, freezing it’s a viable option. Just make sure to thaw it before boiling.
Filtering and Preparing the Sap for Boiling
To filter and prepare the sap for boiling, start by straining it through a fine mesh sieve or cheesecloth to remove any debris or impurities. This step is crucial to ensure that your final product is clean and free from any unwanted particles. Place the sieve or cheesecloth over a clean container and slowly pour the sap into it. Gently press on the sieve or cheesecloth to help the liquid pass through while trapping any solid matter.
Once you have strained the sap, it’s important to transfer it to a clean pot or pan for boiling. Make sure the container you use is large enough to accommodate the amount of sap you have collected. It’s also recommended to use a stainless steel or enamel-coated pot, as these materials are less likely to react with the sap.
Before you start boiling the sap, it’s a good idea to skim off any foam or scum that may have formed on the surface. This can be done using a spoon or ladle. Removing the foam will help prevent any off-flavors in the final product.
Now that you have filtered and prepared the sap, you’re ready to move on to the final step: boiling. But that’s a topic for the next section.
Boiling the Sap to Create Syrup
Now that you have strained the sap and transferred it to a clean pot, it’s time to start boiling it to create syrup. Place the pot on a stove over medium heat and let the sap come to a gentle boil. Keep an eye on it, as the sap can easily boil over and create a sticky mess. To prevent this, you can partially cover the pot with a lid, leaving a small gap for steam to escape.
As the sap boils, it will start to reduce in volume and thicken. This process can take several hours, so be patient. Stir the sap occasionally to prevent it from burning on the bottom of the pot. You can use a wooden spoon or a heat-resistant spatula for this.
Keep boiling the sap until it reaches the desired consistency. You can test this by using a candy thermometer. Syrup is typically ready when it reaches a temperature of 219°F (104°C). If you don’t have a thermometer, you can also do a visual test by pouring a small amount of syrup onto a cold plate. If it forms a thick, sticky layer, it’s ready.
Once the syrup is ready, carefully remove the pot from the heat and let it cool slightly. It will continue to thicken as it cools down. Finally, strain the syrup through a fine-mesh sieve or cheesecloth to remove any impurities.
Now you have delicious homemade syrup to drizzle over pancakes, waffles, or any other sweet treat you desire. Enjoy!
Storing and Enjoying Your Homemade Sugar
To properly store and enjoy your homemade sugar, follow these simple steps.
First, make sure that your sugar has completely cooled before transferring it to a storage container. This will prevent moisture from forming and causing your sugar to clump together. Airtight containers, such as glass jars with tight-fitting lids, are ideal for storing sugar. They’ll keep it fresh and protect it from any pests or contaminants. Label your containers with the date of production to ensure you use the oldest sugar first.
Store your homemade sugar in a cool, dry place away from direct sunlight. Exposure to heat and light can lead to deterioration in quality and flavor. If you live in a humid area, consider adding a moisture-absorbing packet to your storage container to prevent clumping. Keep an eye on your sugar regularly and discard any sugar that shows signs of spoilage, such as mold or an off smell.
When it comes to enjoying your homemade sugar, you can use it just like you’d use regular granulated sugar. Sprinkle it over your morning cereal, add it to your favorite recipes, or sweeten your tea or coffee with it. The possibilities are endless! Just remember to savor the satisfaction of knowing that you made this sweet treat yourself.

Bushcraft Techniques, authored by Darell Strouth, is an insightful guide that delves into the art of surviving and thriving in the wilderness. Drawing on his extensive experience and passion for the outdoors, Strouth offers practical advice and innovative strategies for mastering bushcraft skills. His website, BushPath.com, serves as a valuable resource for enthusiasts, featuring a wide range of tips, tutorials, and insights into the world of wilderness survival and nature exploration.