
Are you tired of waking up in a soggy sleeping bag after a night of heavy rain? Wondering how you can keep yourself dry and comfortable during your wilderness adventures? Look no further, because in this discussion, we will explore the essential techniques and tips for waterproofing your wilderness shelter.
From choosing the right shelter material to maintaining and repairing waterproofing, we will cover everything you need to know to stay dry and cozy in any weather condition.
So, whether you’re a seasoned outdoor enthusiast or a beginner camper, keep on reading to find out how to protect yourself from the elements and enjoy your wilderness experience to the fullest.
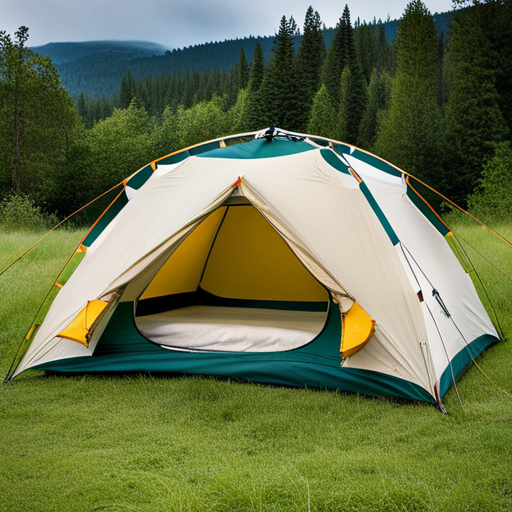
Choosing the Right Shelter Material
When choosing the right shelter material, you need to consider its waterproofing capabilities to ensure your wilderness shelter stays dry and comfortable. It’s crucial to select a material that can withstand rain, snow, and other adverse weather conditions. Look for materials that are specifically designed to repel water, such as coated nylon or polyester fabrics. These materials have a waterproof coating applied to their surface, providing a barrier against moisture.
Additionally, pay attention to the seams of the shelter. Opt for materials with sealed seams, as they prevent water from seeping through the stitching. Another factor to consider is the breathability of the material. While waterproofing is essential, it’s equally important to allow moisture from your body to escape, preventing condensation inside the shelter. Look for materials that offer a balance between water resistance and breathability.
Seam Sealing Techniques
To ensure the waterproofing of your wilderness shelter, it’s important to properly seal the seams. Seam sealing is a crucial step in keeping your shelter dry during rainy or wet conditions. Without proper seam sealing, water can seep through the tiny holes in the stitching, leading to a damp and uncomfortable shelter.
There are a few different techniques you can use to effectively seal the seams of your shelter. One popular method is using a seam sealer, which is a waterproof liquid or tape that’s applied directly to the seams. To use a liquid seam sealer, start by cleaning the seams and removing any dirt or debris. Then, apply the sealer using a brush or sponge, making sure to cover the entire length of the seams. Allow the sealer to dry completely before using your shelter.
Another option is using seam tape, which is a sticky tape that’s applied directly over the seams. To use seam tape, start by cleaning the seams and ensuring they’re dry. Then, carefully apply the tape over the seams, making sure to press it firmly to create a secure bond. Seam tape is a quick and easy solution for sealing seams, but it may not be as durable as liquid seam sealer.
Applying Waterproof Coatings
Now that you have properly sealed the seams of your wilderness shelter, it’s time to move on to applying waterproof coatings. This step is crucial in ensuring that your shelter remains dry and protected from the elements.
Waterproof coatings act as a barrier, preventing water from seeping into the fabric of your shelter and keeping you dry during those unexpected rainstorms.
There are various types of waterproof coatings available, but one popular option is silicone-based coatings. Silicone coatings provide excellent water repellency while still allowing the fabric to breathe.
To apply the coating, make sure your shelter is clean and dry. Start by evenly spraying or brushing the coating onto the exterior of the shelter, making sure to cover all areas. Pay extra attention to seams, as they tend to be more susceptible to water penetration.
Allow the coating to dry completely before using your shelter.
Another option is polyurethane coatings, which are known for their durability and flexibility. These coatings create a strong waterproof barrier that can withstand harsh weather conditions.
To apply polyurethane coating, follow the same steps as with silicone-based coatings, ensuring that the shelter is clean and dry before application.
Using a Groundsheet
Consider using a groundsheet to enhance the protection and durability of your wilderness shelter.
A groundsheet is a waterproof barrier that you place on the ground before setting up your shelter. It acts as an additional layer of protection against moisture, dirt, and sharp objects that could damage your shelter.
When choosing a groundsheet, look for one made of durable and waterproof material such as nylon or polyethylene. Make sure it’s large enough to cover the entire floor area of your shelter, extending a few inches beyond the edges. This will prevent water from seeping in through the sides.
Before laying down the groundsheet, clear the area of any sharp rocks or branches that could puncture it. Once the groundsheet is in place, secure it tightly by using stakes or rocks around the edges. This will prevent it from shifting or blowing away in strong winds.
Remember to fold the excess material under your shelter to create a bathtub-like effect, which will further protect you from ground moisture.
Using a groundsheet is a simple yet effective way to keep your wilderness shelter dry and prolong its lifespan.
Proper Shelter Pitching
Before you start pitching your wilderness shelter, it’s important to ensure that you have properly set up your groundsheet to protect against moisture and damage. Once your groundsheet is in place, it’s time to pitch your shelter.
Proper shelter pitching is crucial to ensure stability and protection from the elements. Start by selecting a suitable location that’s flat and free from any sharp objects or debris. Clear the area of rocks, branches, or any other potential hazards.
Next, unfold your shelter and lay it out flat on the ground. Make sure all the zippers and openings are closed to prevent water from entering. Begin by staking down the corners of your shelter using tent stakes or rocks if stakes aren’t available. Pull the fabric taut to ensure a tight and secure pitch.
Once the corners are secure, move to the center of each side and stake them down as well. This will prevent the shelter from sagging or collapsing under the weight of rain or wind. Adjust the tension of the fabric as needed to achieve a balanced and stable structure.
Ventilation for Condensation Prevention
To prevent condensation buildup inside your wilderness shelter, ensure proper ventilation. Condensation occurs when warm air inside the shelter comes into contact with a colder surface, causing the moisture in the air to condense into water droplets. Without adequate ventilation, the moisture becomes trapped, leading to a damp and uncomfortable environment.
To promote airflow and reduce condensation, make sure your shelter has enough openings for fresh air to enter and stale air to exit. This can be achieved by strategically placing vents or leaving gaps at the top and bottom of the shelter. Additionally, consider using a shelter with mesh panels or windows that can be opened or closed depending on the weather conditions.
It is important to note that while ventilation is crucial for condensation prevention, you also need to strike a balance to keep your shelter protected from rain and wind. Be mindful of the placement of vents and openings to avoid direct exposure to the elements.
In colder conditions, it may be necessary to minimize ventilation to retain heat. However, this can increase the risk of condensation. To combat this, use insulating materials and ensure proper airflow during the day when temperatures are higher.
Staying Dry in Heavy Rain
Stay dry in heavy rain by ensuring your wilderness shelter is properly waterproofed. When it comes to heavy rain, having a waterproof shelter is crucial to keep you dry and comfortable.
There are a few key steps you can take to ensure that your shelter can withstand heavy rain and keep you protected.
First, make sure that your tent or tarp is made from high-quality waterproof materials. Look for shelters that have a waterproof rating of at least 1500mm or higher. Additionally, check for any signs of wear or damage that could compromise the waterproofing capabilities of your shelter. Reinforce any weak spots with seam sealant or tape.
Another important factor to consider is the placement of your shelter. Choose a location that’s elevated and away from potential water runoff. Avoid setting up your shelter in low-lying areas or depressions where water can accumulate.
Lastly, make sure that your shelter is properly pitched and tightly secured to the ground. This will prevent rainwater from seeping in through gaps or flapping fabric.
Maintaining and Repairing Waterproofing
Proper maintenance and repair of the waterproofing on your wilderness shelter is essential for ensuring its effectiveness in keeping you dry. Over time, the waterproofing on your shelter may wear off or get damaged, compromising its ability to repel water.
To maintain the waterproofing, start by regularly inspecting your shelter for any signs of wear or damage. Look for areas where the waterproof coating may be peeling or cracking. If you notice any issues, it’s crucial to address them promptly.
To repair the waterproofing, you can use a waterproof sealant or spray. Apply the sealant to the affected areas, making sure to cover any exposed fabric or seams. Allow the sealant to dry completely before using your shelter again. Additionally, it’s recommended to reapply the waterproofing sealant at least once a year or as needed.
In addition to repairing the waterproofing, proper care and storage of your shelter can also help maintain its effectiveness. When not in use, make sure to clean and dry your shelter thoroughly before storing it. Avoid storing your shelter in damp or humid areas, as this can lead to mold and mildew growth, which can compromise the waterproofing.

Bushcraft Techniques, authored by Darell Strouth, is an insightful guide that delves into the art of surviving and thriving in the wilderness. Drawing on his extensive experience and passion for the outdoors, Strouth offers practical advice and innovative strategies for mastering bushcraft skills. His website, BushPath.com, serves as a valuable resource for enthusiasts, featuring a wide range of tips, tutorials, and insights into the world of wilderness survival and nature exploration.