
Imagine finding yourself stranded in the wilderness, miles away from civilization. The sun begins to set, and the temperature drops rapidly. Panic starts to set in as you realize you have no way to start a fire.
But fear not, for there is a solution that lies within your own two hands. In this guide, we will walk you through the process of creating a hand drill set for friction fires, a skill that could potentially save your life in the most dire of situations.
So, if you’re ready to learn the ancient art of fire-making, and unlock the secrets of survival, then let’s get started on this journey together.
Gather the Necessary Materials
To gather the necessary materials for making a hand drill set for friction fires, you’ll need a few specific items.
First, you’ll need a solid base or hearth board. This can be made from a thick piece of hardwood, such as oak or hickory.
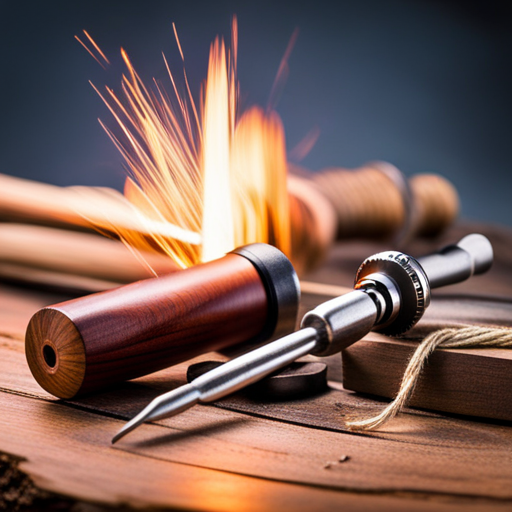
Next, you’ll need a spindle or drill. This should be made from a straight, dry stick that’s about one inch in diameter and about a foot long. It’s important to choose a wood that’s hard and dense, like cedar or birch.
Additionally, you’ll need a handhold or socket. This can be made from a small piece of hardwood or even a stone with a divot carved into it.
Lastly, you’ll need a bow or cord. The bow should be made from a flexible branch or piece of wood, and the cord can be made from paracord or even shoelaces.
Select the Right Wood for Your Hand Drill Set
Now that you have gathered the necessary materials, it’s time to choose the right wood for your hand drill set for friction fires. Selecting the right wood is crucial for the success of your fire-making endeavor. You need to find a wood that’s both hard and dry, as these qualities will ensure the most efficient friction between the drill and the fireboard.
Firstly, look for hardwoods such as oak, hickory, or ash. These woods are dense and durable, which means they can withstand the friction generated during drilling. Avoid softwoods like pine or cedar, as they’re too soft and will wear down quickly.
Secondly, make sure the wood is dry. Moisture in the wood will hinder your ability to create enough heat through friction. Look for seasoned wood that has been properly dried. You can easily test the moisture content by snapping a small piece of the wood. If it snaps cleanly, without any bending or flexibility, it’s dry enough to use.
Remember that the quality of your wood will greatly influence your success in starting a friction fire. Take the time to select the right wood, and you’ll be well on your way to mastering the art of fire-making through friction.
Prepare the Spindle and Fireboard
Begin by selecting a hardwood spindle and fireboard for your hand drill set. The spindle should be straight and about 12 to 18 inches long, with a diameter of around 1 inch. Hardwoods like oak, maple, or hickory work best, as they’re dense and durable. Avoid softwoods like pine, as they tend to produce more friction and wear out quickly.
Next, prepare the spindle by sharpening one end to a point. Use a knife or a whittling tool to carefully shape the tip into a cone shape. This will help create a small, concentrated area of contact with the fireboard, increasing friction and heat generation.
Now, move on to the fireboard. Choose a piece of hardwood that’s about 1 inch thick and 12 to 18 inches long. Cut a V-shaped notch near one end of the fireboard, about half an inch from the edge. The notch should be about 1 inch deep and wide enough to accommodate the spindle. This will serve as a resting place for the spindle and create a channel for the ember to collect.
Shape and Assemble the Hand Drill
After preparing the spindle and fireboard, you’re ready to shape and assemble the hand drill set.
The first step is to shape the spindle. Use a knife or a sharp tool to carve the end of the spindle to a point. This pointed end will create the necessary friction when it’s rotated against the fireboard. Make sure the point is sharp and smooth to maximize the efficiency of the hand drill.
Next, take the fireboard and create a small depression or notch in the center. This will serve as a resting place for the spindle. The depth of the notch should be just enough to hold the spindle securely in place without it wobbling or moving around too much.
Once you have shaped the spindle and created the notch in the fireboard, it’s time to assemble the hand drill set. Place the pointed end of the spindle into the notch on the fireboard, making sure it sits snugly. Hold the fireboard firmly in place with one hand, and use the other hand to grip the spindle.
With the spindle securely in place, you’re now ready to start the friction fire-making process. Apply downward pressure on the spindle and begin rotating it between your palms in a back and forth motion. Keep the pressure and speed consistent to generate enough heat for the fire to ignite.
Create a Tinder Bundle
To create a tinder bundle, gather a small collection of dry and highly flammable materials. Look around your surroundings for items such as dry grass, leaves, bark, or even dried pine needles. These materials are excellent for catching a spark and igniting into flames. Make sure to choose materials that are free of moisture, as dampness will make it difficult for the fire to start.
Once you have gathered your materials, begin by creating a small nest-like structure with the dry grass or leaves. Start by forming a loose pile, and then gently twist and fold the materials into a compact bundle. The key is to create a space where oxygen can circulate and fuel the flames.
Next, take a small piece of bark or any other dry material and place it at the bottom of your tinder bundle. This will act as a base for your ember, making it easier to transfer the heat and start the fire.
Remember to keep your tinder bundle close to your friction fire set and prepare yourself to ignite it as soon as you have a glowing ember. With proper preparation and the right materials, you’ll have a tinder bundle ready to ignite and start your friction fire.
Practice Proper Hand Drill Technique
To improve your friction fire skills, it’s important to practice proper hand drill technique.
The hand drill technique involves using a wooden spindle and a fireboard to create friction and generate heat.
First, find a suitable piece of wood for your spindle. It should be straight, dry, and about as thick as your thumb.
Next, create a notch in the fireboard by cutting a small groove near the edge. This will serve as the socket for your spindle.
Place the spindle in the notch and hold it firmly between your palms. Apply downward pressure and start rotating the spindle back and forth between your hands.
Keep the pressure consistent and maintain a steady rhythm. As you rotate the spindle, it will create friction against the fireboard, generating heat that will eventually ignite the tinder bundle.
Remember to adjust your hand placement and pressure as needed to maintain efficiency and prevent fatigue.
With practice, you’ll develop a smooth and efficient hand drill technique that will increase your chances of successfully starting a friction fire.
Troubleshooting and Tips for Success
Having a solid understanding of troubleshooting techniques and essential tips for success will greatly enhance your ability to master the hand drill technique for friction fires.
When it comes to troubleshooting, one common issue is insufficient pressure applied while drilling. To overcome this, ensure that you’re exerting enough downward pressure on the drill to create the necessary friction.
Another problem you might encounter is a lack of speed or consistency in your drilling motion. To address this, practice maintaining a steady and rapid back-and-forth motion with the hand drill.
Additionally, if you find that the drill is becoming too hot and causing the friction material to smolder rather than ignite, try using a lighter touch and decreasing the duration of each drilling session.
To increase your chances of success, there are a few tips you should keep in mind. Firstly, select the right materials for your hand drill set. Choosing a hardwood spindle and a softwood hearth board will provide the best combination of durability and friction.
Secondly, ensure that your hand drill set is properly prepared before starting. This includes carving a notch in the hearth board and properly shaping the drill to ensure a good fit.
Lastly, practice proper hand drill technique and technique, as discussed in the previous section, to improve your overall success rate.

Bushcraft Techniques, authored by Darell Strouth, is an insightful guide that delves into the art of surviving and thriving in the wilderness. Drawing on his extensive experience and passion for the outdoors, Strouth offers practical advice and innovative strategies for mastering bushcraft skills. His website, BushPath.com, serves as a valuable resource for enthusiasts, featuring a wide range of tips, tutorials, and insights into the world of wilderness survival and nature exploration.